Share:
Overview
In this tutorial, we will be building a simple Spring Boot application and deploying it to a local Kubernetes cluster. We will explore some helpful utility libraries for adapting Spring Boot to the Kubernetes way of doing things.
We will be employing some useful Maven plugins to help us build an application image and all required Kubernetes resources to run it. The source code for this tutorial can be found on GitHub, so feel free to download it in case you get stuck along the way. First things first, we need to set up our workstation.
 Configuring the Tools
For this tutorial, we will need the following development tools:
JDK 11+
AdoptOpenJDK is a great option for development workstations. Verify the JDK by typing the following command:
java -version

We will be using Docker to build container images. Verify docker is running with the following command:
docker version

Docker Hub
We will be pushing images to Docker Hub as part of this tutorial, so we will need to make sure we login to Docker Hub:
docker login --username [USER] --password [PASSWORD]
Minikube
We will be using a local Minikube cluster to deploy our application. To verify that Minikube is installed, use the following command:
minikube version

To start the Minikube cluster, we will use the following command:
minikube start
Minikube should autodetect the appropriate hypervisor implementation for your setup (“hyperkit” was chosen for my Mac). To verify the cluster is running type the following command:
minikube status

Let’s make sure our kubectl (installed as part of the Minikube installation instructions) command line utility is currently using the minikube configuration:
kubectl config use-context minikube
MetalLB
We will be using MetalLB as a load balancer implementation for our Minikube cluster. It is available as an add-on for Minikube. We must enable it:
minikube addons enable metallb
Unfortunately, MetalLB doesn’t work out-of-the-box and requires some further configuration so that it has a valid range of IP addresses to assign to the services. To do so, we must create a ConfigMap resource:
This IP address range may not be suitable for your setup. Since I’m using hyperkit, the IP address of my Minikube setup (use minikube ip to see it) is 192.168.64.1.
Save this ConfigMap definition in a file named metallb-configmap.yml in the local directory (it might be a good idea to move this into our project directory later) so that we can apply it to our cluster using kubectl:
kubectl apply -f metallb-configmap.yml
With all of our tools in place, we are now ready to create our application.

Creating the Spring Boot Application
The simplest way to get started with Spring Boot is to use the Spring Initializr site. Luckily, it provides a scriptable endpoint we can use to generate our project with the curl command:
curl https://start.spring.io/starter.tgz \
    -d dependencies=web,actuator \
    -d baseDir=spring-k8s \
    -d packageName=hello \
    -d name=hello \
    -d javaVersion=11 \
    -d groupId=hello \
    -d artifactId=spring-k8s \
    -d version=1.0.0-SNAPSHOT \
    -d bootVersion=2.3.1.RELEASE \
    | tar -xzvf -
We have now generated a Spring Boot project in the spring-k8s directory. Let’s make sure everything is working properly. From the project directory, issue the following command:
./mvnw spring-boot:run
Once Maven finishes building the project and running some tests, it will start up the Spring Boot app. Visit http://localhost:8080/actuator to verify that everything is working properly. At this point, it might make sense to import the project into an IDE like IntelliJ IDEA, Eclipse, or Netbeans, because we’re going to be writing some code.
Saying Hello
Our application doesn’t do anything meaningful yet, so let’s create the obligatory HelloController class (located in the hello package at src/main/java/hello/HelloController.java):
Restart the application and visit http://localhost:8080/hello to make sure the controller is registered properly. Shut down the application, because we’re going to run it as a Docker container next.
Building the Image
Since we’re using Spring Boot 2.3, creating an image for our application is a snap. The spring-boot-maven-plugin includes a brand new build-image goal which allows us to build an OCI image using Cloud Native Buildpacks. Let’s build the image using the following command:
./mvnw spring-boot:build-image
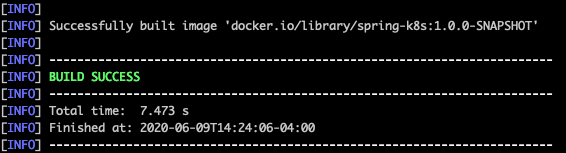
The build should succeed and the output will be something similar to this:
To verify, take a look at what has been built:
docker images

Here, we see our spring-k8s image as well as a couple of other images required by the spring-boot-maven-plugin in order to build our image.
The image is built, but the name is docker.io/library/spring-k8s:1.0.0-SNAPSHOT. Let’s fix that. According to the Spring Boot documentation, we can customize the image’s name by setting the property spring-boot.build-image.imageName in the pom.xml file:
pom.xml
Here, I’ve set the repository name to “callibrity” which corresponds to my employer’s Docker Hub organization. The image name is set to the project’s artifactId and the tag is the project’s version. Be sure to set the repository name to your Docker Hub account (or another repository you have access to). Let’s rebuild the image and verify the new image name:
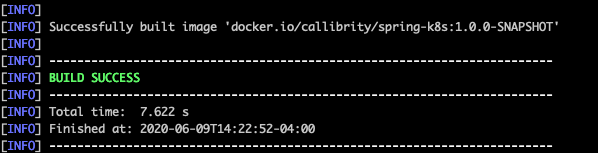
That image name looks better. Let’s run our application as a container using our new image:
docker run -p 8080:8080 callibrity/spring-k8s:1.0.0-SNAPSHOT
The application should now be running as a Docker container. Again, let’s visit http://localhost:8080/hello to make sure everything is still working as expected (use Ctrl-C to shut down the application when finished). We have successfully packaged our application as an OCI image, but in order for our Kubernetes cluster to run it, we need to push it to a registry.
Pushing the Image to a Docker Hub
We will be using the kubernetes-maven-plugin provided by the JKube project to push the image to Docker Hub, so let’s install it now:
The kubernetes-maven-plugin is designed to be a seamless experience for all of your Java/Kubernetes needs. Normally, it would be building the image for us, but since we’re using the spring-boot-maven-plugin to build our image, we need some additional configuration properties to our pom.xml file to let it know which image we’re using:
pom.xml
Here, we’re setting the jkube.generator.name property to the exact same image name we’re using for the spring-boot-maven-plugin. By default, JKube tries to push the latest tag for any SNAPSHOT project. However, since we aren’t building a latest tag locally, it will not be able to find it. We use the docker.skip.tag property to turn that feature off.
JKube supports various authentication options, for Docker Hub, but we are going to use the credentials stored in our ~/.docker/config.json file. Since we established these credentials earlier via docker login, we can use the kubernetes-maven-plugin to push our image to Docker Hub:
./mvnw k8s:push
Once it is finished, the output should look like this (using your Docker Hub repository name, of course):

Congratulations! The Spring Boot application image is now published on Docker Hub for all the world to use. We now need to create some Kubernetes resources to run our application.
Creating Kubernetes Resources
This is where JKube really starts to shine. With zero configuration, we can use the kubernetes-maven-plugin to create Kubernetes Deployment and Service resource definitions to run our application:
./mvnw k8s:resource
Once that command is complete, we should see something similar to the following output:
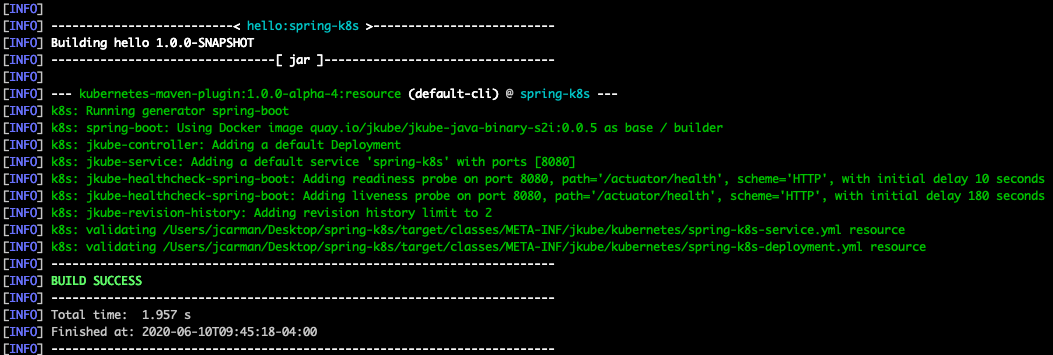
JKube will generate the resource definitions in the target/classes/META-INF/jkube/kubernetes directory. Let’s take a look at the generated service:
If not specified, a Service will be of type ClusterIP which means it is only accessible from within the cluster. Let’s update our settings so that the generatedService is of type LoadBalancer:
Here, we set the jkube.enricher.jkube-service.type property to LoadBalancer. Let’s regenerate the resource definitions so that we pick up that change:
./mvnw k8s:resource
Our resources should be ready now, let’s deploy them to Kubernetes.
Deploying to Kubernetes
To deploy our application to Kubernetes, we will ask JKube to “apply” the resource definitions to our cluster:
./mvnw k8s:apply
After this build completes, we should see output similar to this:

We have successfully deployed our application to our Kubernetes cluster! Let’s verify that it is running. First, we need to figure out the LoadBalancer address in use for our Service using the following command:
kubectl describe service spring-k8s
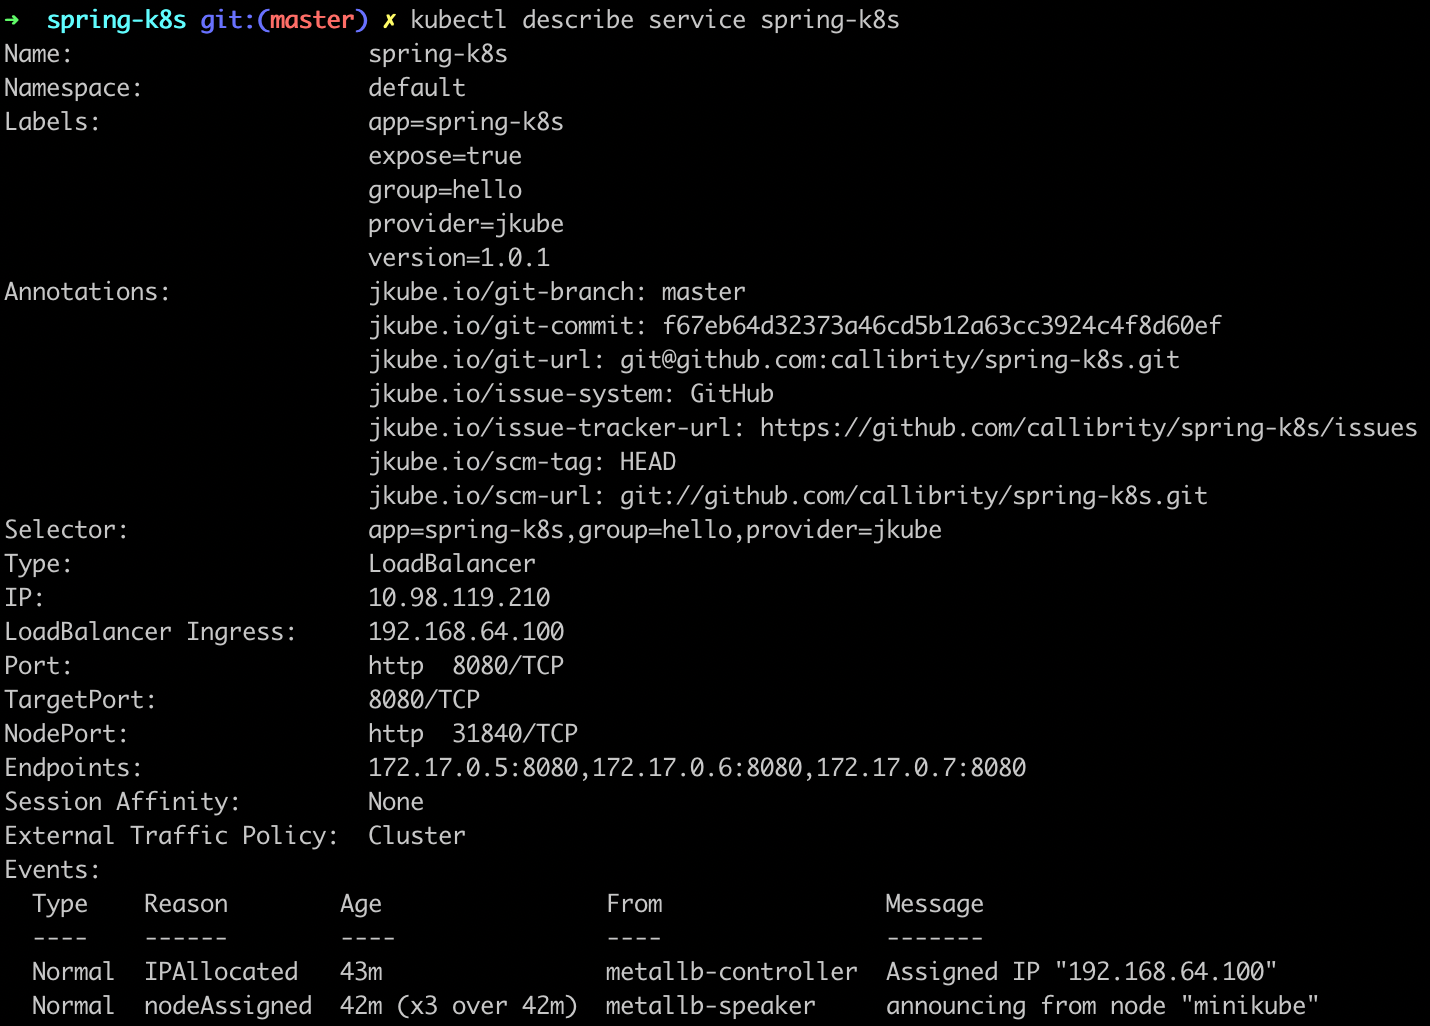
We can see that our LoadBalancer has an ingress IP address set to 192.168.64.100, so we can verify our application is running properly by visiting http://192.168.64.100:8080/hello. We now have a working Kubernetes application! Let’s automate all of these steps a bit to make it easier to make changes to our application.
Creating a Delivery Pipeline
We now have all the pieces in place to create a delivery pipeline. Using the following script, we can quickly deliver our changes to the Kubernetes cluster:
This script loosely mimics the normal Java release process by:
- Cutting off the SNAPSHOT from our version number in the pom.xml file.
- Clearing the output directory.
- Building the image using the spring-boot-maven-plugin.
- Push the image to Docker Hub.
- Build the resources necessary to run our application using the kubernetes-maven-plugin.
- Apply the resources to our Kubernetes cluster using kubernetes-maven-plugin.
- Update the version number to use the next patch version as SNAPSHOT in the pom.xml file.
Changing the version number each time will force Kubernetes to update our application. Let’s save this script in a file called pipeline.sh (make sure it’s executable) and execute it:
./pipeline.sh
With this handy delivery pipeline at our disposal, now it’s time adapt our Spring Boot application to its new Kubernetes home.
Kube-ifying the Application
To take advantages of some of the features Kubernetes has to offer in our Spring Boot application, we will be using the Spring Cloud Kubernetes library. To do that, first we need to import the Spring Cloud Bill of Materials, or BOM to our project as a dependencyManagement entry:
This imports all Spring Cloud dependencies as dependencyManagement entries, so we don’t have to specify their versions. Thus, all we have to do to incorporate the Spring Cloud Kubernetes library into our project is:
Because of the magic of Spring Boot auto-configuration, that’s all we have to do to activate the library and trigger it to start helping us take advantage of Kubernetes features like ConfigMaps.
Configuring the Application
To build cloud-native, twelve-factor applications, we need to make sure the application can be configured externally. Kubernetes provides ConfigMaps for storing non-sensitive application configuration data. In order to leverage ConfigMaps in our application, we will first need to modify it to use an externalized property. Let’s revisit our HelloController:
Here, we’re injecting the greeting member variable with the configuration property named hello.greeting. Let’s provide a default value for the property in the application.properties file (located in src/main/resources):
Spring Cloud Kubernetes will need access to the Kubernetes API, so the service account used by the Deployment will need elevated permissions. JKube allows us to define resource fragments in the src/main/jkube directory which will be enriched with other data and generated as resource definitions. Let’s define a Role resource fragment named role.yml in the src/main/jkube directory that sets up the permissions required by Spring Cloud Kubernetes:
A Role by itself doesn’t really affect anything. The Role must be bound to a “subject” (in our case, a ServiceAccount) in order for it to be used. Let’s define a RoleBinding resource fragment in the src/main/jkube directory named rolebinding.yml:
Here, we’re binding the spring-cloud-k8s role to the spring-k8s service account (defined using a Maven property reference in the resource fragment). But, where did the spring-k8s service account come from? We will need to define it in the pom.xml file under the kubernetes-maven-plugin configuration using JKube’s XML configuration mechanism:
We again use the Maven project’s artifactId to reference both the ServiceAccount and Deployment names. Now that the we have assigned the correct permissions to our application, we should be able to read the ConfigMap correctly. There’s only one problem, we don’t have a ConfigMap yet. Let’s define another resource fragment in the src/main/jkube directory named configmap.yml:
Normally, we wouldn’t necessarily store environment-specific configuration data (i.e. ConfigMaps) in the same source code repository as our project, but for the purposes of this tutorial, it’s totally fine. There’s only one last piece of the puzzle to put in place before we can start using the ConfigMap ; we need to tell Spring Cloud Kubernetes the name of the ConfigMap to use. By default, Spring Cloud Kubernetes will look for a ConfigMap with the name equal to the spring.application.name property. Let’s set that in our application.properties file:
We now should be able to run our pipeline to take advantage of the ConfigMap we have created:
./pipeline.sh
Once the pipeline is complete, we should be able to visit the /hello endpoint of our service and see the new greeting “Howdy, Spring-K8S!”. Using a ConfigMap is great for non-sensitive configuration data, but sometimes we have configuration data we don’t want anyone to see.
Keeping a Secret
Let’s update our application to use a RESTful service which requires an API Key. Let’s use this Numbers API hosted at Rakuten RapidAPI (you’ll need to sign up to get an API key) to add a little “color” to our greeting responses. First, let’s create a NumberFactsService class (located in the hello package at src/main/java/hello/NumberFactsService.java):
The details of this service aren’t terribly important, other than that it requires a configuration property named hello.apiKey in order to successfully call the API. Let’s add a default value to our application.properties file:
This will allow the project to build without errors, since the hello.apiKey value is required by NumberFactsService. Next, let’s update our HelloController to use this new service:
Now, a fact about a random number will be included with every response. In order to make this work, we need to supply this API key to our application, but we don’t want to use a ConfigMap since it is sensitive information (anyone with our API key could use our account to make API calls).
Once you login to RapidAPI (I used my GitHub account to authenticate), you should see your API key automatically included in the X-RapidAPI-Key field in the API explorer interface for the Numbers API. We need this value to create a secret to be used by our application:
kubectl create secret generic spring-k8s-secret \
         --from-literal=hello.apiKey=[YOUR_API_KEY]
One option to inject this value into our application is to use an environment variable. We do this by using a resource deployment resource fragment located in src/main/jkube/deployment.yml :
Here, we inject the hello.apiKey value from the spring-k8s-secret as an environment variable named HELLO_APIKEY where it will automatically be detected by Spring’s PropertySource abstraction and matched with the hello.apiKey property required by our application.
Another option, however, is to have Kubernetes mount our secrets as a volume and let Spring Cloud Kubernetes automatically scan the secrets volume directory for our properties (again using the deployment.yml resource fragment):
Kubernetes will create a directory named /etc/hello in our container. Inside that directory, there will be a single file named hello.apiKey where the entire contents of the file is the secret’s value. We don’t really need to concern ourselves with these details, as long as we name our properties inside our secrets consistent with what we require in our application and we use Spring Cloud Kubernetes to load them. We do have to tell Spring Cloud Kubernetes where to look and we must do this using a property in a new bootstrap.properties file (located in the src/main/resources directory):
Spring Cloud Kubernetes will scan the /etc/hello directory recursively for secret files and automatically include them as properties in your application.
Now that we have wired everything together, it’s time to run our pipeline again:
./pipeline.sh
When we access the /hello endpoint, we now see our greeting as well as some enlightening information about a random number! We now know how to externalize configurations for our application, but we still need to make sure our application behaves like a true Kubernetes application from cradle to grave.
Controlling the Application Lifecycle
For the most part, Kubernetes will take care of our application’s lifecycle needs automatically. However, a Kubernetes application can provide certain “hints” and behave in certain ways to make Kubernetes’ job much easier.
As a Spring Boot application starts, there is quite a bit of initialization that takes place and it can take a few seconds before the actual web server (in our case Apache Tomcat) is running and responding to requests. To let Kubernetes know when our application is actually “alive”, we can register a liveness probe for its container within the Pod. Spring Cloud Kubernetes automatically configures a new actuator endpoint /actuator/health/liveness (implemented using health groups) for us to use as our liveness probe. To register the liveness probe, we will use a deployment resource fragment, located at src/main/jkube/deployment.yml:
Here, we’re telling Kubernetes to wait 5 seconds before it begins calling our liveness probe and that it should wait 15 seconds between each call. If the liveness probe fails 3 times in a row, our application container will be considered “dead” (not alive) and Kubernetes will kill it. At that point, the container subject to the Pod restart policy (defaults to Always). This liveness probe will run perpetually on the container every 15 seconds throughout the lifecycle of the container. Sometimes, we might want to treat the initial liveness check differently than the ongoing liveness checks. Version 1.16 of Kubernetes introduced the notion of a startup probe which we can use for this purpose:
The startup probe will begin after an initial delay of 10 seconds and check the container every 3 seconds. If it fails for 20 times in a row, the container will be killed. Just because a container is alive doesn’t necessarily mean that it is ready to accept incoming requests.
Kubernetes provides readiness probes as a means to determine whether the Pod should be considered eligible to serve traffic for the application’s Service. Again, Spring Cloud Kubernetes provides an actuator endpoint /actuator/health/readiness purpose-built for this occasion:
The readiness probe will begin checking the application after an initial delay of 5 seconds (after the startup probe is complete of course) and it will continue checking it every 30 seconds. If the readiness probe fails 3 times in a row, the Pod will be removed its Service until the readiness probe succeeds at least once again. By default, only the readinessState health indicator is included in the readiness probe group, but we can implement our own custom health indicator and add it to this group:
A custom readiness health indicator may check external dependencies or include some gating for startup requirements (warming a cache or loading configuration data). The key is that it’s up to the application to know whether or not it is ready to serve traffic. By default, the readinessState health indicator only guarantees that the application context has been fully initialized. People are often confused by the naming, but a readiness probe continues to monitor the readiness of your application throughout its lifecycle and will move it in and out of the Service accordingly. Kubernetes will attempt to keep your Pod running, but at some point, it will decide to terminate it.
Kubernetes applications need to shut down gracefully. When using a HorizontalPodAutoscaler, Kubernetes will be intentionally shutting down instances of applications in order to scale down its resource usage when not needed. As an instance is shutting down, it should try to complete any in-flight transactions. Luckily, there’s a property we can use to turn on this behavior:
Here’, we set the server.shutdown property to graceful and Spring Boot will make sure our application performs a graceful shutdown. But, what happens if an application is gracefully shut down and there is no instance to service traffic?
In order to achieve high availability, we must run multiple instances or “replicas” of our application Pod. Let’s update the configuration of the maven-kubernetes-plugin to tell it to run 3 replicas:
With all of these reliability improvements in place, we can now run our pipeline to redeploy our application:
./pipeline.sh
After the pipeline completes, we can use the following command to see that everything is in place:
kubectl get all

We now see that our application is running, with three pods in service!
Conclusion
We have started from a vanilla Spring Boot application and developed it into a real Kubernetes application. We used the Spring Boot Maven plugin to generate our application images. We used JKube’s Kubernetes Maven plugin to push the image to Docker Hub, generate resources, and apply those resources to our local Minikube cluster. Thank you for following along!
Cleaning Up
We have likely gathered up a bit of clutter along the way. Docker Hub has a bulk delete feature:

To remove your application from the Kubernetes cluster:
./mvnw k8s:undeploy
To shut down Minikube:
minikube stop
To completely remove all traces of Minikube:
minikube delete
To clean up your local Docker system:
docker system prune -a


